Contents
Document templates
You can use the system templates to generate documents right in the CRM.
Template creation and editing is only permitted to your CRM administrator and users having access to the relevant fields in the CRM.
Go to Main menu — Settings — Templates and add administrators and supervisors for templates and users, who will have access to templates (see Access settings).
Creating templates
Add all document forms circulating in your company to the CRM:

1. Enter template name, description and category, if necessary. Then link it to the CRM: if the template contains fields from any profile in the CRM — tick all the relevant fields in the drop-down list.
For example, the template for a real estate commercial offer should be associated to objects, a rental agreement template should be connected with deals (it should also comprise fields from contacts and objects associated with this deal), a property viewing form would normally be associated with activity.
You can also add templates without linking them to the CRM — vacation request forms, for example:
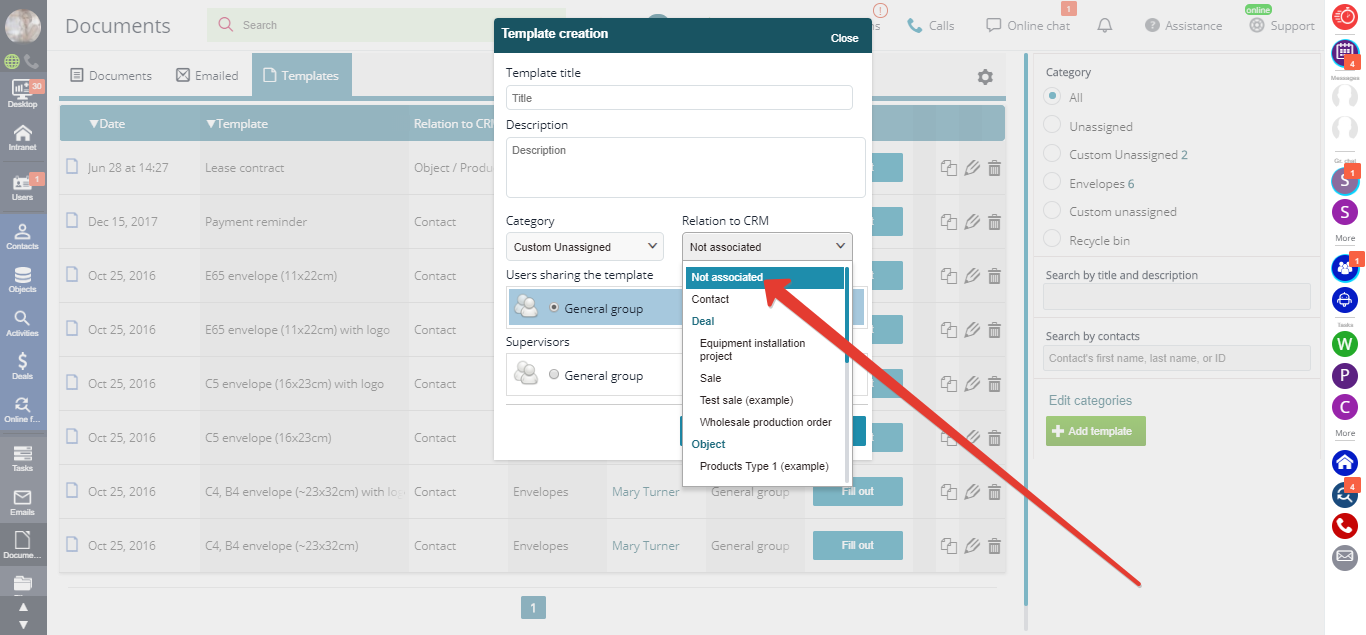
2. Select users, who will have the access to templates, and users responsible for templates (these employees will access and control all the templates of their colleagues).
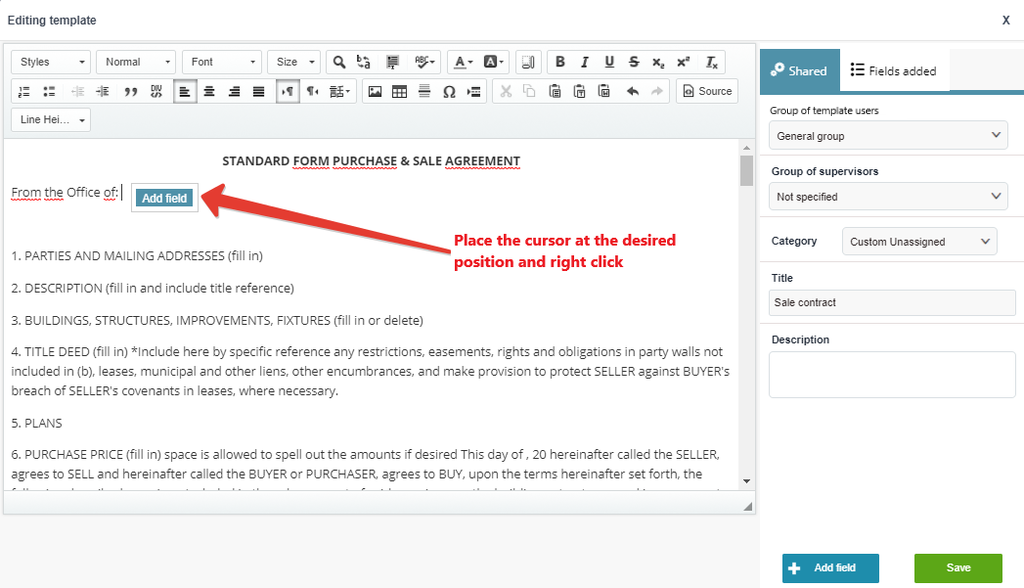
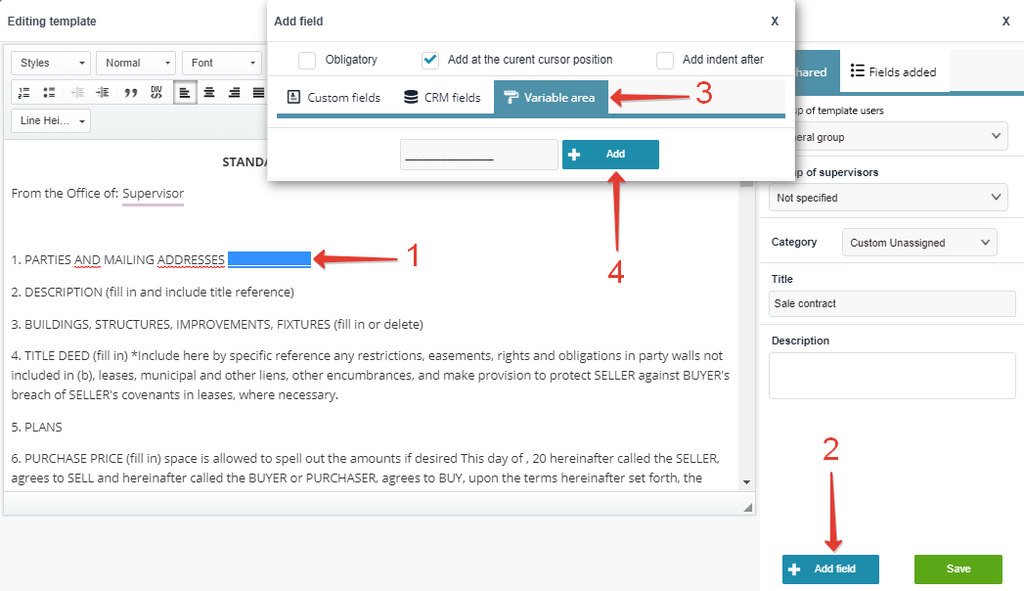
3. Place all the necessary fields to the relevant positions in the body of the template.
- Drag the cursor to the relevant line and right click on the mouse.
- Click "Add field": a new page will open.
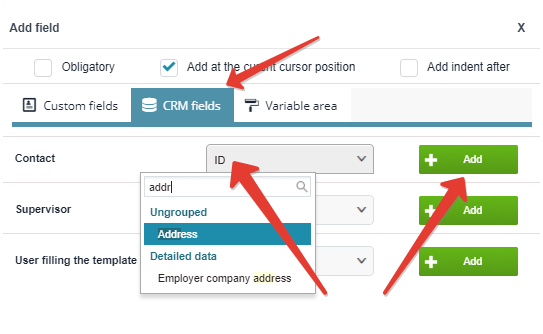
- Select "CRM", then associate the correspondent CRM fields or add fields with no link to the CRM.
- Leave a note in the document template.
4. You can group the fields and vary the display formats of date, time, etc.:
You can also indicate template areas to be highlighted (instead of ____________). Clicking these areas will open a form to be filled in a convenient format:
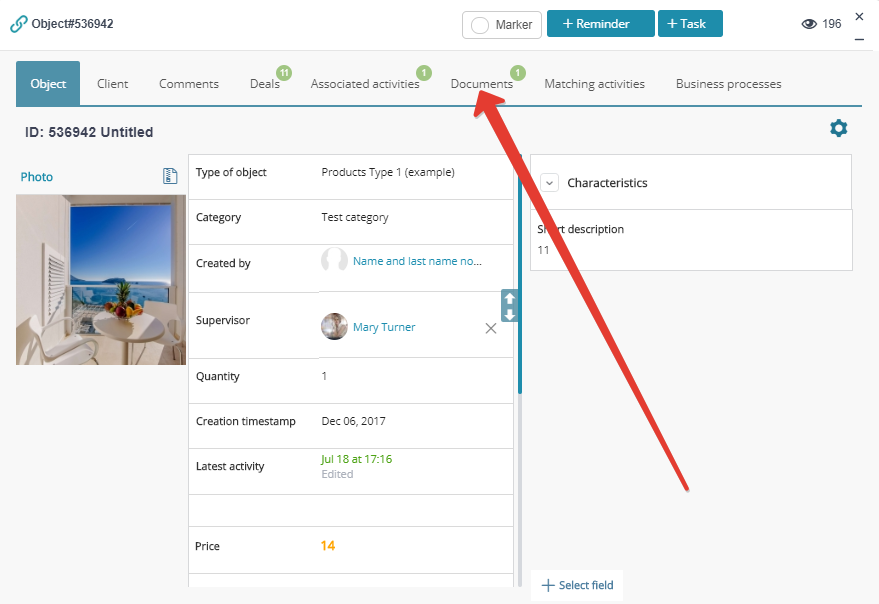
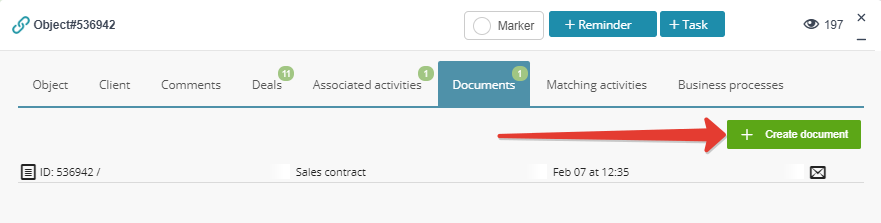
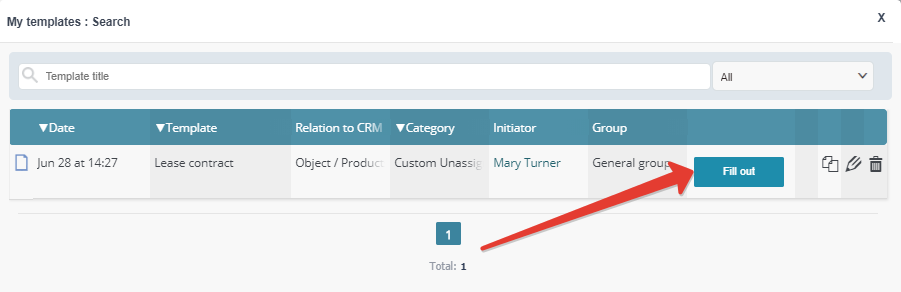
You can create, print, and save documents either from templates list, or right from object/contact/activity/deal profile:
Templates are not limited in structure complexity. To add a customized template, create it in the HTML format and add it to the system in the source code mode:
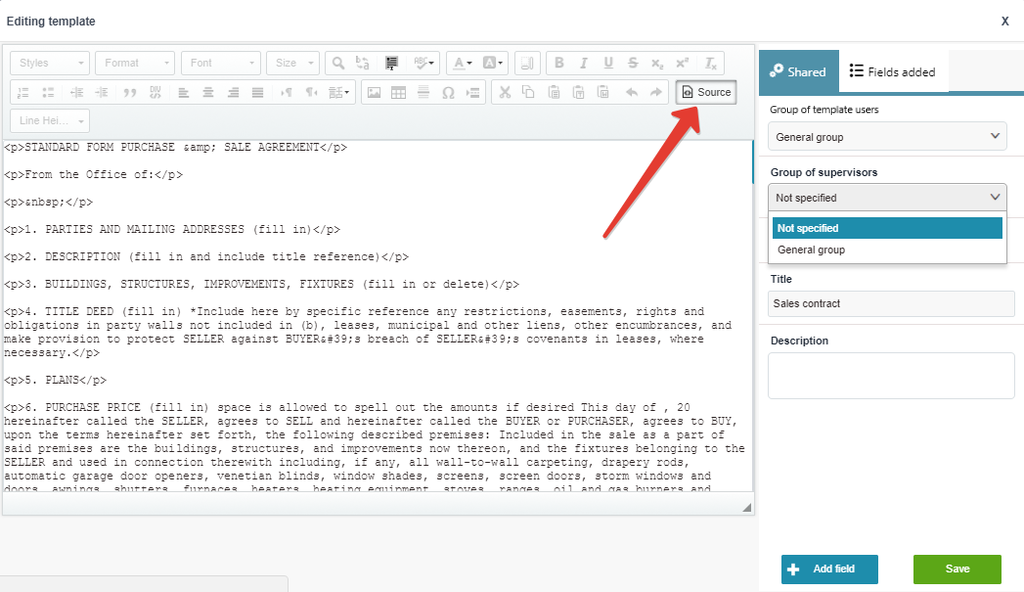
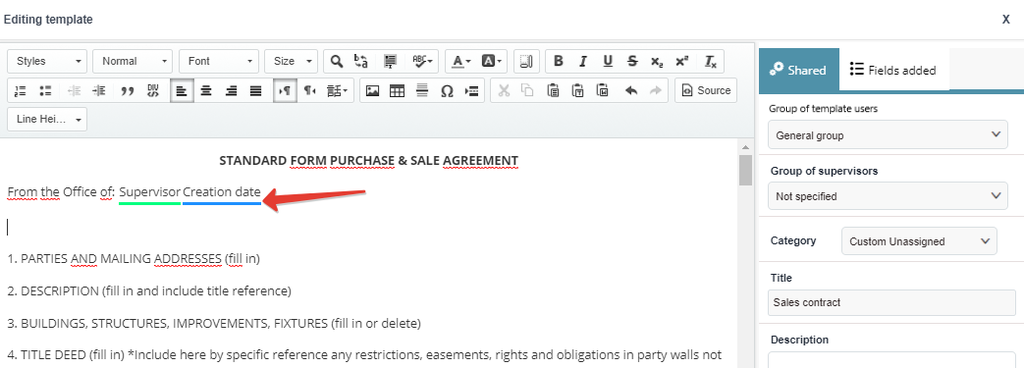
Then go back to viewing mode and associate all the necessary fields to the relevant areas in the template.
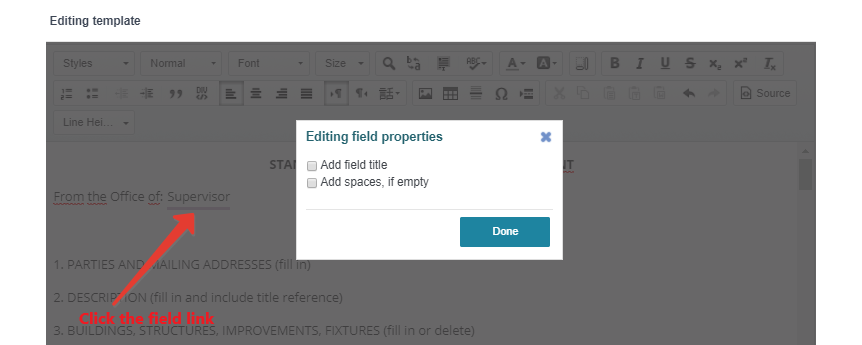
You can adjust fields view — for example, the way text content appears in the field when entered (i.e. "Last Name: Johnson" instead the typed-in "Johnson"). You can also edit date view. To edit formats, click the relevant tag in the template:
and select the view format:
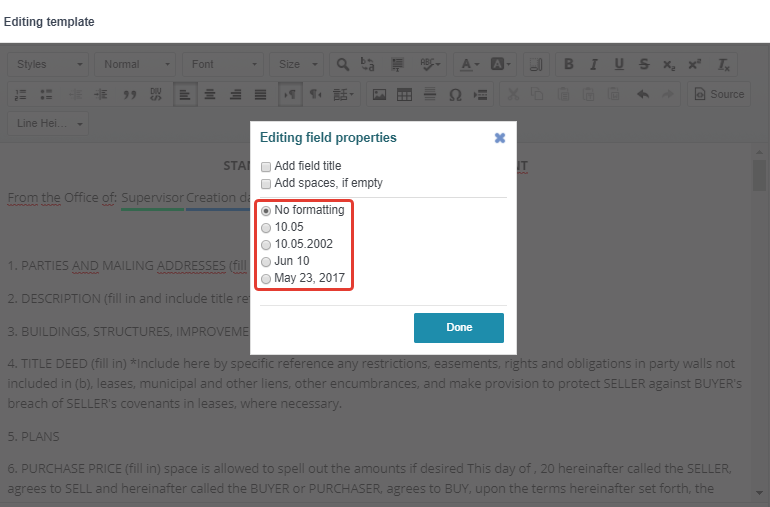
Image output parameters are available in output tag settings for fields of type "Photo".
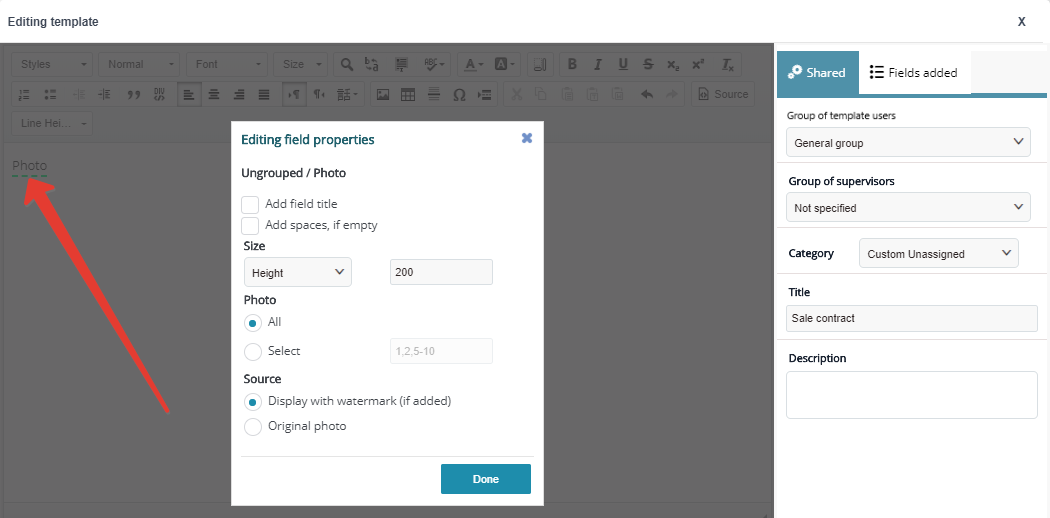
You can adjust the following:
1) image size in template (original size or custom size in pixels or percents);
2) number of images to display (in case the field contains multiple images) in the following format: 1, 2, 4-10, for example, to display the first and the second image together with all the images from the fourth to the tenth. If you need to display all images, except the first one, use the following format: 2-1000 (from the second image up to the upper limit);
3) watermarks.
You must also see:
Back to Contents